Tag Archives: do-it-yourself

Thanksgiving, Just Late

This year Nate and I wanted to try to host Thanksgiving at our house. We also ambitiously decided to make the meal ourselves. What were we thinking?!

It ended up going really well, with only a few hiccups. Ever the procrastinators (how did we end up together?) we started everything the morning of… cleaning, the turkey, prepping, etc. Everything. I guess we both work best under pressure. We were lucky to have grocery assistance from both sets of parents plus my sister, and my sister came early to help entertain the boys and prep food. We had one casualty… one of our favorite kitchen tools, our Deep Covered Baker, broke in all the hustle and bustle. But, lucky us, we just got a bunch of free and discounted Pampered Chef stuff, including the RockCrok and a mini Deep Covered Baker, so I think we’ll survive.

Everyone seemed to enjoy the meal, and we were lucky to have all five boys together at once, a rarity these days. Everyone stayed afterward and relaxed, napped, played video games, laughed, and just enjoyed our time together. It was a great day!

One thing I always struggle with is using leftovers creatively. I don’t mind reheating things myself for lunches and for dinners when Nate isn’t home to cook for me, but sometimes having the same meal more than three times in a row gets really boring. I asked around my friends and moms groups about using Thanksgiving leftovers, and found some great ideas. A friend a fellow blogger shares a ton of great ideas here, and she inspired me to try a few things myself.

Everyone knows I can’t cook… I’m not joking.
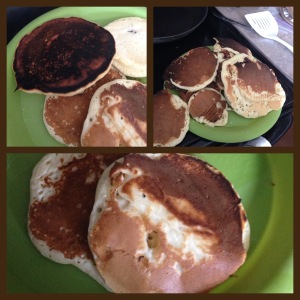
ruined pancakes... my specialty
Here are some pancakes I worked really hard to ruin a few weeks ago

So the first thing I did was totally easy because, ya know, it has to be for me even attempt it. I have been totally digging this Stoneware Microwave Egg Cooker I got from Pampered Chef recently. I’ve used it to cook actually decent pancakes and have been using it to cook scrambled eggs in nice neat patties for Atticus and I. Friday I made eggs with leftover ham and green pepper, and we both loved them.

Last night Nate and I made cheesy turkey and ham pockets and they were fabulous!

IMG_8145

We used:

  • some chopped turkey and ham
  • 2 packs of crescent rolls
  • 8 oz cream cheese
  • some shredded cheese
  • some chopped onion and green pepper
  • some melted butter
  • seasonings

It made 8 pockets.

We divided the cream cheese in half, melted it a little in the microwave, then added turkey to half and ham to the other half. Then we added a handful of shredded cheese and a handful of chopped onions and green pepper and lightly seasoned with salt and pepper.

We separated the crescent rolls into rectangles of two crescents attached together. Then, we scooped a few forkfuls of the mixture into each rectangle and folded the ends of the dough over to make pockets. I melted some butter and sprinkled some garlic powder into it, then brushed the butter over the pockets. We baked them at 350 for about 20 minutes.

turkeypockets

Delicious! What didn’t get eaten was wrapped up so I can take them for lunches and freeze some for later meals.

How did your Thanksgiving holiday go? Did you spend good times with family or friends? Any leftovers?

Starting A Blog

I was recently asked to put together and deliver a presentation on “Blogging Basics” for the library where I work. I certainly don’t see myself as a blogging expert, but I do enjoy putting together and delivering presentations, and I would consider myself pretty knowledgeable in the field of social media endeavors, marketing, and web 2.0 and library 2.0 kinds of things. I agreed… then I forgot about it and procrastinated until the day before.

I think I did all right. #Nailedit

Without further ado, here is said presentation:

http://prezi.com/6755ts3bxpw8/so-you-want-to-be-a-blogger/


I really enjoyed this, though I had a small crowd. For one thing, I always enjoy presenting much more than I think I will. For another thing, organizing my thoughts this way helped me sort of review my own blog and renew my passion to write and share my stuff.

Getting Started

What will your blog be?

1. Pick a topic or niche for your blog. Ask yourself:

  • What do you want to write about?
  • What are you passionate about?
  • What blogs do you enjoy reading?
  • Who is your audience?
  • What do you want your audience to know?

2. Pick a name or title for your blog. Ask yourself:

  • What describes your blog?
  • Is your potential name memorable and catchy?
  • What are similar blogs called?
  • What are keywords your audience might search for?
  • What does your potential name look like on screen and sound like aloud?

3. Pick a platform for your blog. Ask yourself:

  • Are you willing to pay for hosting?
  • How much flexibility, customization, plug-ins do you want?
  • Do you want to host, install, and configure on your own, or rely on a service to do that for you?
  • Do you want to monetize? (Keep in mind monetizing isn’t easy with some blogging platforms)

Some popular blogging platforms include…

WordPress: WordPress is available for free with limitations or pay for a full-on experience and tons more options. It is extremely customizable, plug-ins are available (if you pay for the service), there are more than 1,000 themes. WordPress is one of the most popular blog and website creation services.

Blogger: Blogger is a Google service and is available for free. Several templates and backgrounds are available. While there isn’t as much freedom as far as customization it is easier to monetize with Blogger, using Google’s AdSense service.

Tumblr: Tumblr is a free social network that allows users to share content and create original posts. Tumblr is sort of a mix between Twitter and Facebook, and could be considered a form of micro-blogging.

Medium: Medium is a free platform that allows users to focus on writing. There are no plug-ins, sidebars, ads, etc. The focus is truly on writing, and the idea is that users will share their own stories and ideas and read others’ as well.

Marketing Your Blog

Get the word (your words!) out there!

1. Write good content.

  • Use proper grammar and punctuation.
  • Write what you know and be confident in what you’re writing about.
  • Be original and interesting.
  • Use quality images, videos, and other sources. Many of your readers are visual consumers.
  • Let your readers get to know you.

2. Establish your blog.

  • Create a few good first posts. You want to have content (not an empty shell of a blog) when you start getting visitors.
  • Create an about page and determine how you will use your sidebars and menus.
  • Consider adding an email subscribe button or an RSS feed subscription button to your blog.
  • Consider creating a Facebook fan page and other social media network pages for your blog.
  • Always respond to questions and comments on your blog and emails you receive via your blog. You want to establish not just your writing, but also a relationship with your readers so they’ll keep coming back.

3. Share your blog.

  • Tell your friends and family you’ve started a blog. Ask for support.
  • Consider (again) creating fan pages or accounts through various social networks (Facebook, Twitter, Pinterest, etc.).
  • Share your content on both your fan pages and on your personal social media networks.
  • Tell people about your blog in-person if the opportunity arises naturally.
  • Don’t be annoying with any of the above. Don’t beg.

4. Take advantage of what’s popular.

  • Use popular hashtags and keywords when sharing content.
  • Blog about current events and other popular topics.
  • For blogging ideas Google “trending,” or check Twitter, Buzzfeed, and Yahoo for what topics are currently trending. Share these topical blog entries you’ve written soon, while that trending topic is still actually trending.
  • Consider being a devil’s advocate when blogging about what’s popular. It stirs the pot and gets attention.

5. Do some detective work.

  • Search for content creators and consumers that align with your blog’s niche.
  • Join Facebook groups, subreddits, and message boards that revolve around blogging and your blog’s nice.
  • Follow other bloggers and interact with them.
  • Search Google or other search engines for “[your blog’s topic] blogging groups.”

Maintain the Momentum

Don’t run out of gas!

1. Create and work to achieve blogging goals. Some goal ideas:

  • Write ## blog posts per week.
  • Increase your email/RSS subscribers by ## each month.
  • Update your blog’s Facebook fan page or your Twitter feed ## times each week.
  • Comment on other blogs or message boards ## times each week.
  • Link to ## other blogs each week.
  • Spend ## hours each week marketing, sharing content, and networking with other bloggers.

2. Do something your readers will remember. Try these ideas:

  • Create a series of posts (part 1, 2, 3, etc.) or numbered lists (i.e. “top ten canning recipes”).
  • Run a contest and offer a prize.
  • Flatter your readers by writing about them.
  • Guest post on other blogs, and invite other accomplished bloggers in your subject area to guest post on your blog.
  • Write about something popular or even controversial. Playing devil’s advocate always attracts attention.
  • Refer to or link back to your existing content. Try reviving old posts by creating a post about previous posts.


I’ve thoroughly enjoyed researching ways to make my blog better. A few resources I used are:

Starting Your Blog: http://startbloggingonline.com/, http://www.ehow.com/how_2045008_start-blog.html, http://www.wikihow.com/Start-a-Blog, http://wordful.com/how-to-name-your-blog-what-makes-a-great-name/,

Blogging Platforms: http://mashable.com/2014/05/09/16-minimalist-blogging-platforms/, http://www.edudemic.com/minimalist-blogging-platforms/, https://blog.shareaholic.com/best-blogging-platform/, https://blog.shareaholic.com/best-blogging-platform/)

Marketing Your Blog: http://startbloggingonline.com/how-to-promote-your-blog-and-get-visitors/,

Blogging Goals: http://blog.osmosio.com/101-blogging-goals-grow-blog/, http://theadventurouswriter.com/blogwriting/blogging-goals-types-of-goals-to-set-for-your-blog/, http://theadventurouswriter.com/blogwriting/8-different-tips-for-promoting-your-blog/,

Monetize: http://www.comparebusinessproducts.com/fyi/101-ways-monetize-your-blog-without-irritating-your-readers

Save your seeds! How to save heirloom tomato seeds

This year I decided to save some seeds from my dad’s heirloom tomatoes. There are a few small varieties I love, and I want to grow them next year… Plus, this way I can share seeds with others.

It’s super easy, though it takes more effort than most people realize. Tomato seeds are best once they’ve been fermented, though the process isn’t absolutely vital. This process helps weed out the bad seeds and makes the seeds less likely to carry diseases. It also helps separate the seeds from the clumpy tomato gel.

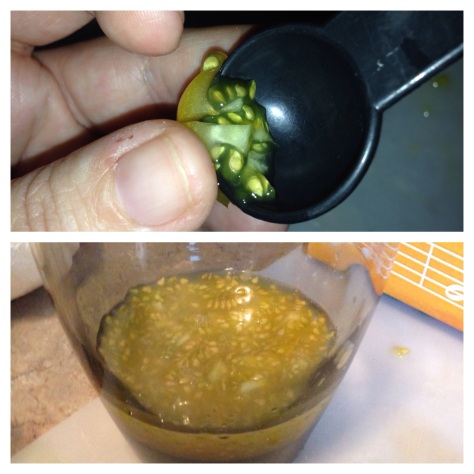
I happened to be making some sundried tomatoes, so when I scooped them out for better drying I just put all the seeds from one variety of tomato in a glass.

IMG_7337.JPG

Next, I added about an ounce of water, and covered the glass tightly with Saran Wrap. I poked a slit into the plastic wrap with a knife so air can aid in the fermentation process. I set the glass on my kitchen window sill where it’s out of the way, and left it there for about a week. It’s recommended that you leave it for 3-5 days.

The seeds will develop a disgusting moldy film on the top— that’s okay, it’s supposed to happen! It might also stink. Mine sure did.

IMG_7214.JPG

As the fermentation happens you’ll notice that the seeds mostly sink to the bottom, though a few will float to the top. This is also a good thing. The good, healthy seeds will sink, and the bad ones will float.

IMG_7215.JPG

After a few days, I lifted the plastic wrap off and gently lifted the moldy film off with a fork. Then I also slowly and gently poured off some of the water and the floating seeds (though some of the floating seeds stuck to the mold). Next, I poured the rest of the glass out through a fine strainer and rinsed the seeds with cool water very thoroughly.

IMG_7319.JPG

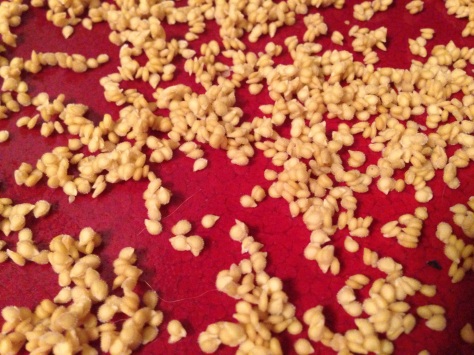
Next I gently blotted the seeds with a paper towel, then poured them into a plate to dry. Do not leave the seeds on a paper towel or paper plate to dry as they’ll stick. Every few hours I tapped the sides of the plate to get the seeds to separate from each other.

IMG_7321.JPG

Once they’re completely dry they’re ready to store. I plan to put mine in a small glass jar, although a paper envelope would also work.

Happy seed-saving!

How to freeze green beans

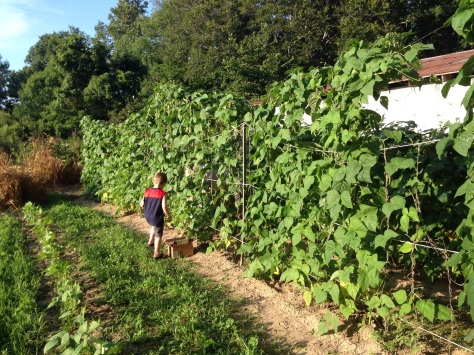
The beans are ripe for the picking, and starting last week there’s about a xerox box or two full of beans ready to pick.

The green beans we grow are heirloom green beans. My dad and I love to try different heirloom vegetables in the garden (we’ve done about 25-30 heirloom tomato varieties!) and green beans are one we’ve had lots of success with each year. He planted a few varieties at my grandma’s house, and one row he built up to be almost 8 feet high. The vibes grow up and up and up so it’s a real space-saver. The tops of the vines have tons of beans, too.

IMG_6885.JPG

IMG_6886.JPG

IMG_6884.JPG

In my opinion the green beans are best straight off the vine raw, that’s not really easy for me to do with all of them. Mary and I like to pickle them, we’ve dehydrated them, and I like to cook them in the crockpot, but perhaps the most versatile thing to do with them is to freeze them to use all year long.

While the process for freezing the beans is by no means difficult, it unfortunately isn’t as easy as just throwing them in the freezer. Freezing beans is a 6 step process, and luckily each step takes only a short amount of time.

IMG_7092.JPG

You’ll need…
A bunch of green beans. A sauce pot. Salt (kosher is better). A colander or two. A few big bowls for ice baths and temporarily storing the beans. Ice. Freezer bags. A straw.

1. Wash. This is easy. Just rinse the beans in cool water, being careful to rub off any cobwebs or dirt.
2. Pop and Pinch. Pinch of the stems, being mindful to leave as much of the bean intact as possible. You can also pop the bean into 1-2 inch pieces, though some people like to leave their beans whole.
3. Boil. Fill a sauce pot with water and add a generous amount of salt, about 1-2 tablespoons per quart of water. The beans won’t be in the water long enough to absorb too much of the flavor but what is absorbed will aid in preserving the flavor and nutrients. Once the water is boiling add your beans and let them boil for 2 minutes. The beans should turn bright green and should taste cooked but should still be quite firm. Do NOT overlook them.
4. Ice Bath. Drain the beans and immediately dump them into an ice bath, stirring gently with a wooden spoon or your hands to ensure that they cool quickly.
5. Drain and Dry. Once the beans are completely cooled drain the water and pat the beans dry with a paper towel.
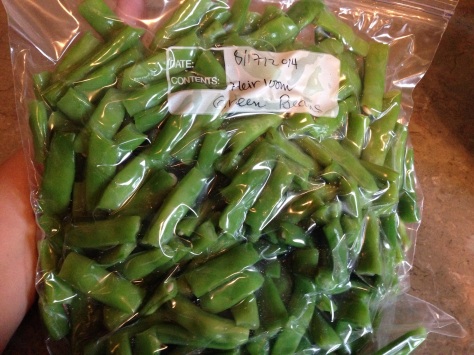
6. Bag. Once the beans are dry you can portion them into freezer bags. I usually do a mix of gallon-sized and sandwich-sized bags, and occasionally a few snack-sized bags. Lay the bags flat and sort of shake them so the beans are all flat and spread evenly. Of course you don’t want to fill the bags too full. I zip the bags almost all the way closed then stick a straw in the end and suck the air out. While still sucking, pull the straw out and quickly zip the rest of the bag. This isn’t the best way to get all the air out but it does keep the bags flatter and easier to store.

IMG_7026.JPG

Zucchini spaghetti lasagna casserole thingy

We seriously need to go to the grocery store, but Nate and I are both holding out. Luckily we have plenty of produce in the garden ripe for the picking. When Nate took off to take Nick back to his mom’s house I decided to buck up and try to cook something stead of relying on Chef Boyardee or pizza rolls.

While we aren’t overwhelmed with zucchini we do seem to have some that are read for harvesting at perfectly timed intervals. Check out this puppy!

IMG_6737.JPG

So tonight I found some frozen ground beef and started browning it. While it was browning I sliced some zucchini in very thing strips using a pampered chef slicer thingy. I layered the zucchini slices on the bottom of the pan, then sprinkled kosher salt and pepper on it and brushed some Italian seasoned oil on it.

IMG_6811.JPG

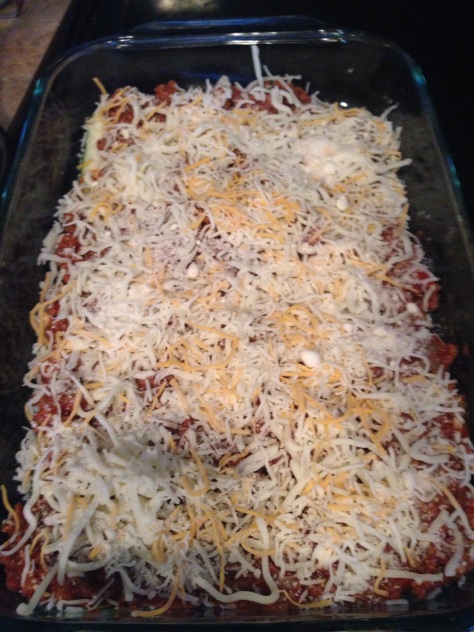
When the meat was done browning I drained it, then dumped it in a bowl and mixed it with chopped onion, some minced garlic, Italian seasoning, an almost full jar of spaghetti sauce, a small can of tomato paste, and… I think that’s it. I spread half the meat mixture, then topped with Parmesan and mozzarella cheese. Also Mexican cheese because I wanted a ton of cheese and that’s all I had. I added another layer of thinly sliced zukes, then the rest of the meat mixture and more cheese. Last I poured a little more Italian oil on the top because it’s so delicious. That didn’t make much sense, though, I know.

IMG_6815.JPG

I baked it uncovered at 400 degrees for about 30 minutes, until the cheese was brown and bubbly.

IMG_6813.JPG

So good! The only thing I wish I’d had was either less beef and more spaghetti sauce, or ricotta, so it could either be more spaghetti-like or more lasagna-like. I’m not sure whether this is zucchini lasagna or zucchini spaghetti. I guess it’s both!

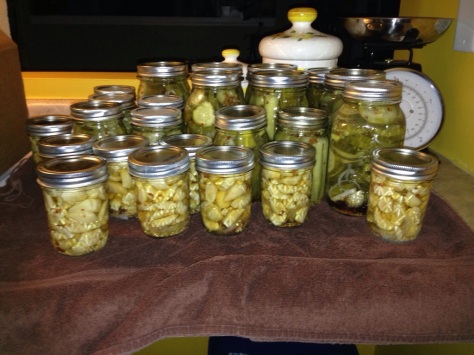
Two pickle recipes plus canning instructions

I’ve been asked a few times for the pickle recipe Mary and I use. Let me make it clear first that Mary is the Pickle Master, not me. I’m like the jester… Just there for jokes. Just kidding. I’m kind of her sidekick. I just do what she tells me. I’m good at following directions, but not organizing the task and managing time. She okayed me sharing the recipe we typically use. And I’ll also share the ones we tried yesterday, for pickle sticks and fridge pickles.

The first recipe goes into the most detail, in case you’re not too familiar with canning. The first recipe is also the on Mary has been using for a few years and most people love these pickles. We’ve done pickled cucumbers, green beans, peppers… you name it. The other recipes we only tried yesterday and haven’t tasted the pickles after they’ve sat but dang they smelled good and the brine was delicious.

Mary’s Famous Pickles
These pickles are dill flavored and quite garlicky with a tad bit of spice. Not a lot of spice, because even my mom loves them. So will you.

Ingredients:
4 cups water
4 cups white vinegar
1/4 to 1/2 cup pickling salt
2 to 3 garlic cloves pealed (per jar)
3 or 4 onion chunks (per jar)
3 small sprigs of fresh dill -OR- 1 teaspoon dried dill (per jar)
~1/2 teaspoon mustard seed (per jar)
~1/4-1/2 teaspoon red pepper flakes (per jar)
~1/2 teaspoon pickle crisp -OR- 1 grape leaf (per jar)

Wash jars, lids, and rings and then boil or steam 4-6 quart jars I your water bath or steam canner for 10 minutes. While your jars are sanitizing, combine vinegar, water, and pickling salt in a saucepan and bring to a boil.

Once jars are sanitized, put the remaining ingredients in each jar. Note that nearly everything is approximate; if you love garlic or onion, add more. Pack the jars tightly with cucumber spears or chips.

Once the brine has boiled ten minutes, use a funnel in the mouth of the jar and pour the brine into each jar until it’s about 1/2 inch from the top. Use a chopstick or something similar to gently like down into each jar to release air bubbles. Then use a clean, wet cloth to wipe the rim of the jar. Place a clean kid on top, then screw a ring on until it’s what I call finger-tight; not too tight.

Put all the packed and lidded/ringed jars in your steam or water bath canner, and process for 15 minutes. Once they’re finished, lift them out and let them cool on the counter. You’ll know it’s a success when you hear the telltale pops of the kids sealing. Let the jars store at least 2 weeks before you go HAM on them.

20140730-200254-72174642.jpg

Pickle Sticks
While I haven’t yet tasted the finished, processed pickles from this I did drink 3/4 of a cup of the brine It’s so delicious, and I think these are going to be awesome. The brine tastes kind of nutty and almost cinnamon-y sweet, sort of like bread and butter pickles.

Ingredients:
9 cups sugar
5 1/2 cups white vinegar
4 cups water
8 tablespoons pickling salt
4 tablespoons celery seed
4 tablespoons + 1 teaspoon of turmeric
1 tablespoon mustard seed

Sanitize 8 pint jars. While that’s happening, combine all the ingredients and bring to a boil. Let the mixture boil for about 5 minutes. Pack the jars while your mixture is boiling.

Once the mixture has boiled about 5 minutes, use a funnel to pour the brine over the pickles in the jars, leaving 1/2 inch head space. Clean the rims, then lid them. Let them process for 10-15 minutes.

We also made fridge pickles and relish yesterday, but I’ll wait to share those until we taste the product. Do you have a favorite pickle recipe? Please share it with me! We always like to try new things.

Zucchini overload = awesome easy lunch

We need to grocery shop, bad… I’m running out of easy stuff to bring for lunch. But while looking over the garden last night I noticed a lone zucchini. Lunch for today was easy peasy… Zucchini pizza!

I brought my small stoneware bar pan from pampered chef, which I use all the time for everything… In fact I may as well buy another. I also brought a snack sized Baggie of shredded cheese, a small cup of spaghetti sauce, and of course a small-medium sized zuke.

20140722-150728-54448482.jpg

First I preheated the oven at work to 400 degrees. While it heated up I sliced the zucchini in half long-ways. Then, I spread the pizza sauce on and sprinkled on the cheese. Sometimes I add oregano, garlic, sliced tomato, basil, mushrooms, or pepperoni, but I was in a hurry and feeling kinda plain when I got my lunch ready last night.

20140722-150904-54544669.jpg

I let the zucchini pizzas bake for 20 minutes, until the cheese was bubbly and somewhat burnt on the pan.

20140722-152423-55463216.jpg

Then my website went down, I received a text from my husband that my child is puking, and our credit card machine stopped working. This is my job and my life. Technology hates me.

Luckily I have awesome coworkers and while I was tethered to my computer my pal Kate brought me my half on a plate, complete with plastic ware and a napkin. So nice. While I would have loved taking an actual lunch break, at least I got to enjoy the deliciousness.

20140722-153333-56013712.jpg

Pickling day! Plus a little about my Mary

That’s right! Between my own garden, my grandma’s and my parents’ it’s time to start pickling cucumbers. My friend Mary taught me how to pickle a few years ago, probably with the intent of teaching me so I’ll go out on my own.

But I won’t go out on my own. I puppy dog her, and it won’t stop anytime soon. OK, MARY??!

I’ll say all this before the pickling because otherwise she won’t read it and neither will you because it’s not nearly as exciting as the pickling. Well it is to me, but maybe not to you.

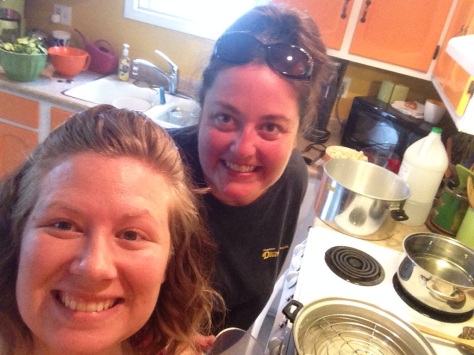
Mary and I met at work. She’s a librarian, I’m a librarian. While I was in school for my masters she gave me advice on projects. When we got smooshed together in the information services department and stuck on the desk 10% of our working hours we meshed really well. We didn’t really have a choice… So we realized how alike we are in weird quirky ways (like watching shitty reality tv, eating, reading the quirky stuff, etc.) and we just clicked. Or maybe I [desperately] didn’t give her a chance not to be my friend. My best friend. Is this creepy yet?

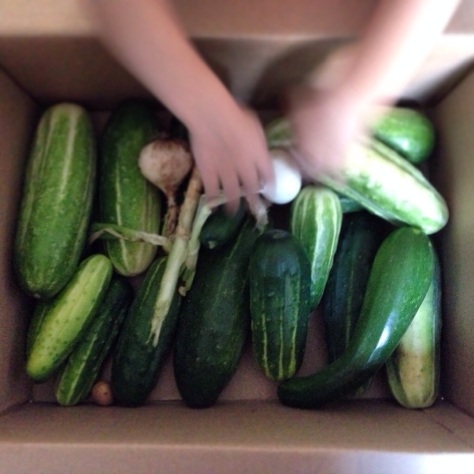
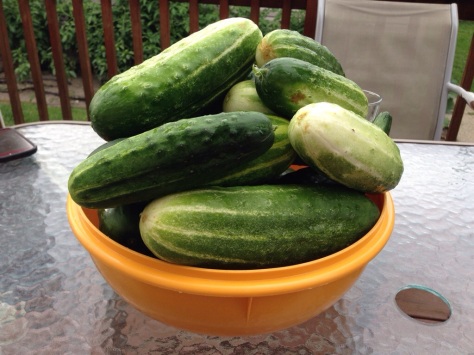
Anyway, yesterday we pickled cucumbers and garlic. So good! I have 5 or 6 pickling cucumber plants, and my parents and grandma have a few, too. I harvested a nice sized box of cucumbers and a few onions from our gardens and set out to Mary’s house.

20140720-120837-43717225.jpg

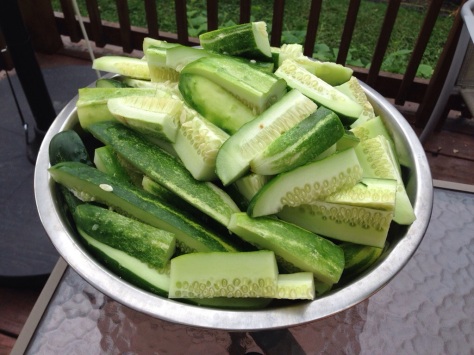
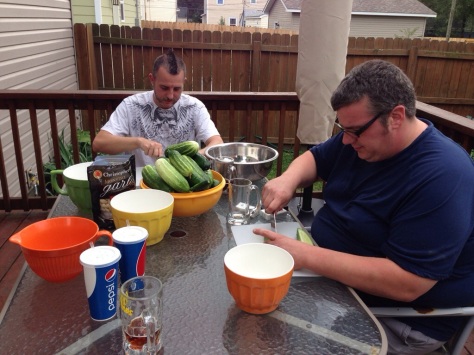
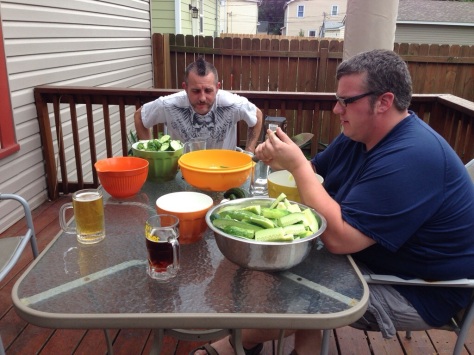
We started by washing the cucumbers and onions, then we stuck the boys with the slicing job. Both Nate and Steve work in the food industry so they’re always good helpers :-). They cut the cucumbers longways and sometimes in half if they were big, scraping the mushy seedy part out on the bigger spears. They took some of the skinnier cucumbers and sliced them chip-style so we’d be able to make both types of pickles.

20140720-121156-43916904.jpg

20140720-121156-43916097.jpg

20140720-121155-43915299.jpg

20140720-121154-43914431.jpg

20140720-121157-43917710.jpg

While Nate and Steve chopped Mary and I washed jars, found kids and rings to match, the set the jars in the steam canner to boil. We also started boiling the brine, a mixture of equal parts white vinegar and water.

20140720-121539-44139018.jpg

Mary also bought a big bag of peeled garlic which we planned to pickle. This stuff is like crack! The guys chopped the woody ends off and we had the cucumber chunks, chips, and garlic in separate bowls, plus a smaller bowl with a little bit of garlic and the onion slivers.

20140720-221430-80070024.jpg

20140720-221429-80069151.jpg

20140720-221428-80068275.jpg

Once the jars and brine were boiling we got started adding the spices to the jars. We put some dill (fresh is always best, but we only had fried this time), mustard seed, red pepper flakes, and pickling salt, then we add some chopped onion and a few garlic cloves (although we forgot that part on our first batch this time). We’ve added grape leaves in the past to keep the pickles crunchy, but this time I think we used something called pickle crisp along with the seasonings.

20140721-205037-75037878.jpg

20140721-205038-75038767.jpg

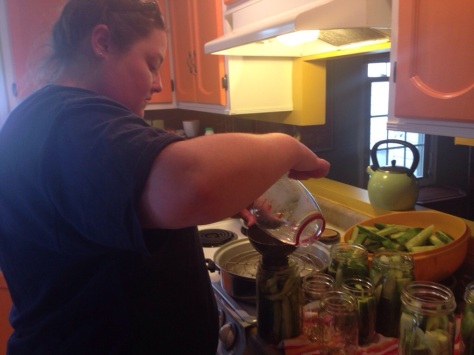
Next we packed the jars with the sliced cucumbers. This part can be surprisingly tricky; it’s like a puzzle. You want to use slices that fit well with each other so that they’re packed tight. When the jars get nearly full we break chunks off and top them off. Next, we poured the brine in to about half an inch from the top of the jar.

20140721-205249-75169901.jpg

20140721-205250-75170754.jpg

20140721-205251-75171590.jpg

After the jars are packed we wiped the rims with a clean cloth, the. Set the lid on top and put a ring on, just finger tight. We put the jars onto the rack of the steam canner, then put the lid on and let it boil for about 15 minutes.

20140721-205453-75293461.jpg

20140721-205456-75296015.jpg

20140721-205455-75295170.jpg

20140721-205454-75294306.jpg

Once the steam canner has boiled at least 15 minutes we pop her open and gently lift the jars out, letting them rest, cool, and *pop* on a kitchen towel on the counter.

20140721-205924-75564790.jpg

And onto the next batch….

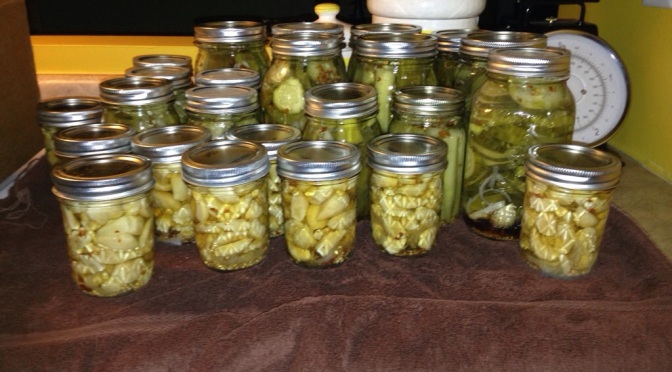
This weekend Mary and I did two batches of pickles (spears and chips), and one batch of pickled garlic. Yum! Our results look amazing… And I can’t wait to eat them. But not so fast! They need to sit and get really pickly, at least 4-6 weeks if I remember correctly.

20140721-205724-75444426.jpg

I always have such a good time and learn so much when I pickle with Mary. When I’m going through it Mary is always there. When I think I’m going through it but really I’m just being sensitive or over analytic Mary shakes me sane. She’s a good no-nonsense friend, but don’t let the no-nonsense fool you, she’s one who actually cares. At work when we have to talk on the phone I often quickly and loudly tell her I love her before she can hang up, for three reasons: (1) because it makes her laugh awkwardly, (2) it makes others around either of us laugh too, and (3) because I mean it.

20140721-210639-75999549.jpg

20140721-211130-76290432.jpg

20140721-211130-76290635.jpg

Dehydrating Strawberries & Bananas

I hate letting stuff go to waste. Especially food. I hate letting it go to waste more than I hate letting it go to waist. HA! Get it? Ugh, it’s true, though.

Anyway, we eat lots of strawberries and bananas in this house. We go through them like crazy on and off… Sometimes Trent will polish a package of strawberries in a day and other times a package nearly goes to waste. Same with bananas. Actually, if I’m being honest, most of our produce either goes quickly or hardly at all and there seems to be no rhyme or reason to it. But, no worries 🙂

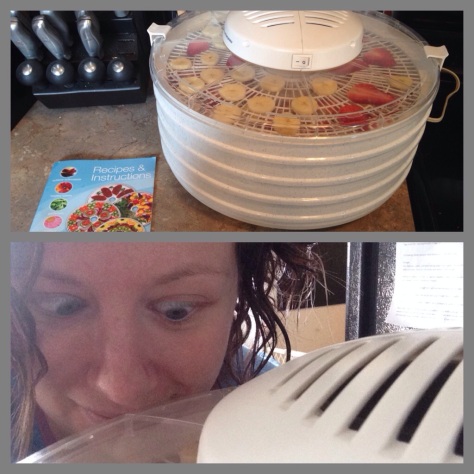
For Christmas my mother got me a dehydrator. I’ve used it quite a bit in the past few months and I love it! I tend to use it on produce that isn’t being used as quickly as I think it should, but I can’t wait until garden season so I can use fresh homegrown produce in it.

20140318-213957.jpg

I had a package of strawberries that wasn’t going anywhere and an overripe banana so I decided to throw them in the dehydrator yesterday.

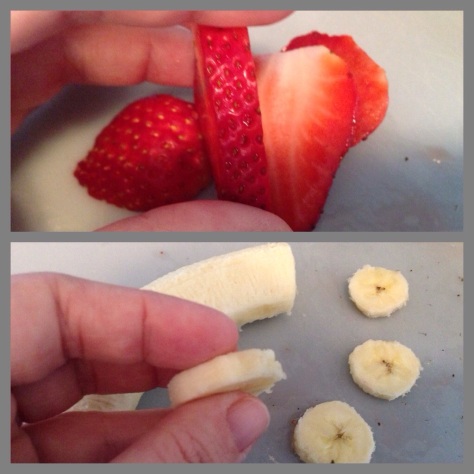
First I washed and took the tops off the the strawberries, then sliced the fruit. I slice strawberries into about 1/4 inch slices and bananas into 1/8-1/4 inch slices. The thinner the fruit is sliced the faster it dries. I have kind of found the thickness I like, but for guidelines try the Backpacking Chef website.

20140318-220014.jpg

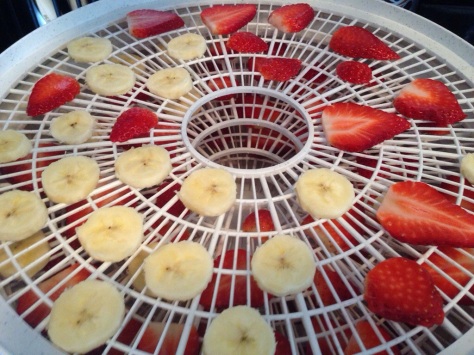
As I slice the fruit I lay the pieces onto the drying trays. It’s important to keep all the trays in the dehydrator, even if you don’t put food on all the sheets. Using less sheets doesn’t allow the appliance to work properly.

20140318-222613.jpg

Once all the fruit is spread on the sheets and everything is stacked up I attach the lid, insert the drying motor, attach the clips that keep everything closed and together, and switch the dehydrator on. Strawberries and bananas at to the thickness I cut them to need to dry for about 12-14 hours. I check mine after a few hours and then again around 10 hours. And of course every time I walk past the dehydrator I take a whiff. The whole house smells fruity and fresh, but up close is even better.

20140318-223223.jpg

The fruit is done when it is firm and not pliable but not crispy. It should have a good taste with no burnt flavor. It will look slightly shriveled. I let it rest on the trays for a few hours before packaging. Depending on when I plan to use it I either package in a sandwich bag or in a jar.

20140318-223651.jpg

I usually just use dried bananas and strawberries alone as a snack, but they also go well with nuts and even some mini chocolate morsel thingies. Yum.

Sweet Potato Chips

I’m so exhausted from the PLA Conference this week that I didn’t have much on the docket for today, other than cuddling with my boys and making sweet potato chips.

I don’t buy sweet potatoes often, but I’ve been trying to eat a little healthier lately so I bought two not long ago. I keep forgetting I have them and decided to make both into chips so I can eat them whenever I want, instead of having to bake or mash them. I’ve made regular potato chips but not sweet potato chips so I’ve been eager to see how these taste. Turns out: They. Are. Amazing.

20140316-163728.jpg

To make these sweet potato chips I used a Simple Slicer and Microwave Potato Chip Maker, both from Pampered a Chef.

First I washed and peeled the sweet potatoes. You don’t have to peel them, but I like them that way.

20140316-164928.jpg

Next, I used the Simple Slicer to slice the sweet potatoes. The top piece has spokes to hold the produce on for easier and safer slicing, but I have to admit I just hold the potato with my hands. Keep in mind that doing it that way is not suggested.

20140316-165549.jpg

Ideally you should use the sliding mechanism and the produce holder to slide the potato safely across the blade, set at thickness setting 1. Again, I do things in a way that will likely make me lose a finger one day. Anyway, next I slid the potato up and down to make thin slices.

20140316-165742.jpg

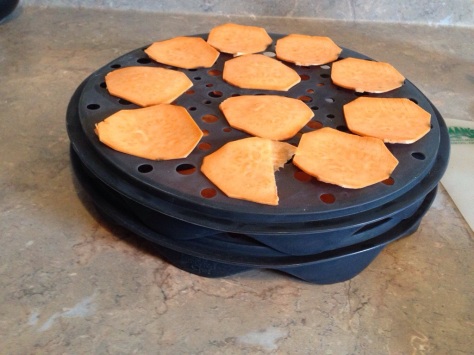
Once I have several slices I lay them flat and without touching other pieces on the Microwave Chip trays, then stack the two trays on top of a each other.

20140316-165941.jpg

Put the two stacked trays in the microwave, then heat for about 3 minutes. I do between 3-5 minutes, depending on how even my slices are. I check after 3 minutes and heat at 30 second increments after. Please note, my microwave is filthy. Don’t judge.

20140316-170155.jpg

You want to make sure hung chips are crispy, not raw, but not burned. See the three differences below:

20140316-170325.jpg

Sometimes I let the chips sit on the tray for about a minute after cooking to let them harden a little more. Luckily I have two sets of trays so while one set of chips on the trays is heating I can slice and prepare a second set, and let the set cool at the same time. It’s all about rhythm, baby.

When they’re finished, try not to eat them all at once. It won’t hurt you, in fact they’re quite healthy. But you’ll be sorry later when you don’t have them to snack on.

20140316-170713.jpg